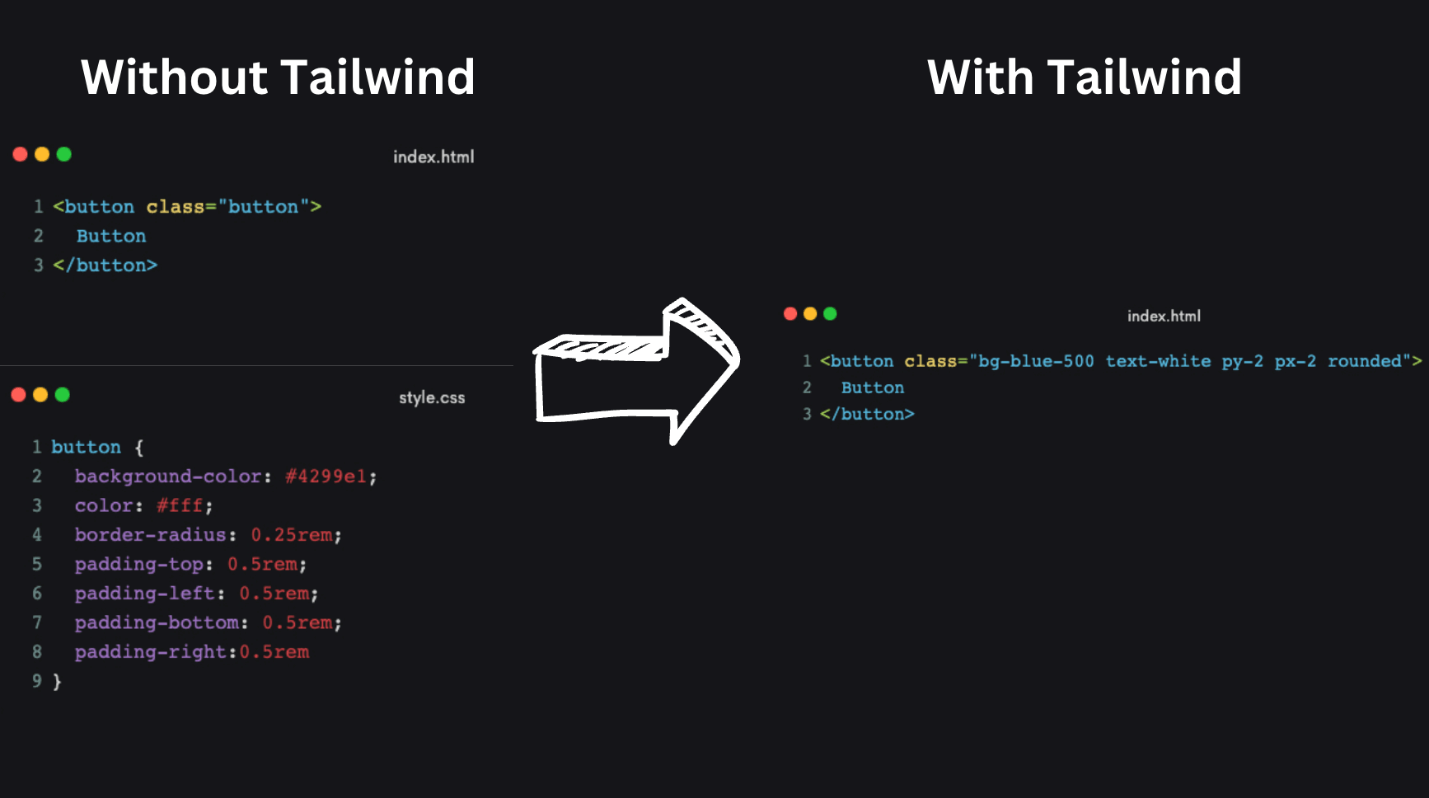
Tailwind CSS has changed how developers build interfaces. Instead of reaching for a component library that dictates your design, you compose layouts directly in your markup using small, single-purpose utility classes. The result is faster iteration, fewer CSS files to maintain, and complete control over the final look.
Tailwind CSS v4 is a ground-up rewrite of the framework. It is faster, simpler to set up, and requires significantly less configuration than v3. The old tailwind.config.js file is gone. The content array is gone.
Separate PostCSS plugin installs are mostly gone. What remains is a utility-first CSS framework that now takes full advantage of modern CSS features like cascade layers, registered custom properties, and color-mix().
This tailwind css installation guide covers the two main ways to install Tailwind CSS v4: the standalone CLI for simple projects, and the Vite plugin for framework-based setups. It also covers integration with React, Vue, and Next.js, and how to customize your project using the new CSS-first configuration system.
What Is Tailwind CSS
Tailwind CSS is a utility-first CSS framework that lets you build interfaces by combining small, single-purpose class names directly in your markup. Instead of writing custom CSS, you compose styles using classes like flex, pt-4, text-gray-800, and rounded-xl directly on your HTML elements.
This is different from component-based frameworks like Bootstrap, which ship pre-styled buttons, cards, and navbars. Tailwind gives you the building blocks and gets out of the way. The output is entirely yours.
Version 4 pushes this further. It ships with a new engine built on Lightning CSS, a Rust-based compiler, making full builds up to 5x faster than v3, and incremental builds over 100x faster. Setup is now a single line in your CSS file.
Tailwind CSS Prerequisites
Before running any install commands, make sure your environment is ready.
You need Node.js installed (version 14 or higher). Tailwind's build tools run on Node, so check your version with node -v before proceeding. You also need either npm or yarn for package management, both work fine. Basic familiarity with the command line and HTML/CSS is assumed throughout this guide.
For framework projects (React, Vue, Next.js), have a project already scaffolded before adding Tailwind. The installation steps below assume you have a working project structure in place.
Install Tailwind CSS with CLI
The standalone CLI is the right choice for plain HTML projects or any setup where you are not using a bundler like Vite. It requires no PostCSS configuration and no additional plugins.
Initialize the project
Create a project folder and set up npm:
mkdir my-project
cd my-project
npm init -y
Install Tailwind CSS and the CLI
In v4, the CLI ships as a separate package. Install both together:
npm install tailwindcss @tailwindcss/cliThat is the entire installation. No PostCSS, no autoprefixer, no separate config packages. The v4 CLI bundles everything it needs internally.

Add Tailwind to the CSS File
Create a src/input.css file and add a single import:
@import "tailwindcss";That one line replaces the three separate @tailwind base, @tailwind components, and @tailwind utilities directives from v3. Tailwind now handles everything through its built-in import system.
Run the build process
Start the development build with watch mode:
npx @tailwindcss/cli -i ./src/input.css -o ./dist/output.css --watchTailwind compiles your CSS and writes it to dist/output.css. Reference this file in your HTML with a <link> tag. The --watch flag keeps the process running and recompiles on every file save.
For a one-time production build:
npx @tailwindcss/cli -i ./src/input.css -o ./dist/output.css --minifyThere is no need to configure PurgeCSS separately or set NODE_ENV. The v4 engine handles unused-style removal automatically, keeping your final CSS file lean.
Install Tailwind CSS with the Vite Plugin
For most modern projects, including React, Vue, SvelteKit, and similar setups, the Vite plugin is the recommended tailwind installation path. It provides tighter build integration and requires the least configuration of any method.
Create a Vite project
If you do not have one already:
npm create vite@latest my-project
cd my-project
npm install
Install Tailwind CSS
npm install tailwindcss @tailwindcss/viteNo PostCSS config, no autoprefixer. The @tailwindcss/vite plugin handles the build pipeline internally.
Configure the Vite plugin
Open vite.config.js (or vite.config.ts) and add the Tailwind plugin:
<p>`import { defineConfig } from 'vite'
import tailwindcss from '@tailwindcss/vite'</p>

<p>export default defineConfig({
  plugins: [
    tailwindcss(),
  ],
})`</p>
Add Tailwind to the CSS file
Open your main CSS file (usually src/style.css) and add the single import:
@import "tailwindcss";Make sure this file is imported in your JavaScript entry point. That is the complete setup. No content paths to configure, Tailwind v4 detects your template files automatically.
Automatic Content Detection
One of the biggest changes in v4 is the elimination of the content array. Tailwind now automatically discovers which files to scan using built-in heuristics. It respects your .gitignore, ignores binary files (images, videos, zip archives), and scans your source files without any configuration.
If you have templates in a directory Tailwind does not detect by default, use the @source directive directly in your css file:
<p>`@import "tailwindcss";</p>

<p>@source "../views";
@source "../components";`</p>
No JavaScript config file. No glob patterns to maintain.
Integrating Tailwind CSS with Frameworks
Tailwind CSS in React
For a React project using Vite, the setup follows the Vite plugin method above. After scaffolding with npm create vite@latest and choosing React as the template, install the packages, configure the Vite plugin, and add the import to your main CSS file:
/* src/index.css */
@import "tailwindcss";
Import that file in src/main.jsx and Tailwind classes are available in every component.
Tailwind CSS in Vue
Vue with Vite follows the exact same pattern as React. Scaffold the project, install tailwindcss and @tailwindcss/vite, configure the Vite plugin, and add @import "tailwindcss" to your main stylesheet. Import it in src/main.js and it works across all .vue single-file components.
Tailwind CSS in Next.js
Next.js uses PostCSS rather than Vite, so the setup uses a different package:
npx create-next-app@latest my-project
cd my-project
npm install tailwindcss @tailwindcss/postcss postcss
Create a postcss.config.mjs file in the project root:
<p>`const config = {
  plugins: {
    "@tailwindcss/postcss": {},
  },
};</p>

<p>export default config;`</p>
Add the import to app/globals.css:
@import "tailwindcss";Run npm run dev and Tailwind is active across your entire Next.js app. Alternatively, the create-next-app CLI prompts you to include Tailwind during setup, selecting yes handles this configuration automatically.
Framework setup tips
The most common issue across all frameworks is forgetting to import the CSS file in the JavaScript entry point. Tailwind can only generate styles for classes it detects, if the import is missing, no styles compile.
For framework-specific edge cases and additional stacks (Laravel, SvelteKit, SolidJS, Nuxt), the official Tailwind CSS framework guides cover every major environment.
CSS-First Configuration with @theme
In v4, all customization that previously lived in tailwind.config.js now lives directly in your CSS file using the @theme directive. This is how you extend the design system with custom colors, fonts, breakpoints, and spacing:
<p>`@import "tailwindcss";</p>

<p>@theme {
  --font-display: "Satoshi", sans-serif;
  --color-brand-500: oklch(0.72 0.19 142);
  --breakpoint-3xl: 1920px;
}`</p>
These CSS custom properties automatically generate utility classes. --color-brand-500 produces bg-brand-500, text-brand-500, border-brand-500, and all other color utilities immediately. The approach eliminates the context switch between a JavaScript config file and your stylesheets, keeping all project configuration in one place.
Customizing colors
Tailwind v4 uses OKLCH for its default color palette, which gives you perceptually uniform colors across the full lightness range. You can add your own brand colors in any format, hex, HSL, or OKLCH, and Tailwind will generate the full set of utilities for them:
@theme {
  --color-brand-100: oklch(0.95 0.05 142);
  --color-brand-300: oklch(0.85 0.12 142);
  --color-brand-500: oklch(0.72 0.19 142);
  --color-brand-700: oklch(0.55 0.17 142);
  --color-brand-900: oklch(0.35 0.10 142);
}
Each variable maps to a full set of color utilities automatically. You do not need to register them anywhere else.
Customizing Typography and Spacing
Font families, font sizes, and spacing scales all follow the same pattern. Define the CSS custom property under @theme and the corresponding utility class is generated:
@theme {
  --font-sans: "Inter", system-ui, sans-serif;
  --font-display: "Clash Display", sans-serif;
  --spacing-18: 4.5rem;
  --spacing-112: 28rem;
}
--spacing-18 creates utilities like mt-18, px-18, gap-18, and so on. --font-display creates font-display. The naming convention maps directly from CSS variable to utility class, making the relationship between your configuration and your markup easy to trace.
Overriding defaults
If you want to replace a default value rather than add to it, assign the variable directly. To change the default sans-serif font stack:
@theme {
  --font-sans: "Inter", system-ui, sans-serif;
}
To remove a default value entirely, set it to initial:
@theme {
  --color-red-500: initial;
}
This gives you full control over the design system without needing to reach for a JavaScript file at any point.
How to Add Tailwind to an Existing Project
Adding Tailwind v4 to an existing codebase follows the same steps as a fresh installation. Install the package for your build tool, add @import "tailwindcss" to your main CSS entry file, and Tailwind begins scanning your source files automatically.
If you are migrating a v3 project specifically, use the official upgrade codemod:
npx @tailwindcss/upgradeThis tool migrates your tailwind.config.js settings into @theme blocks, updates your CSS directives, and handles the package changes automatically. Teams working on large-scale production migrations sometimes partner with best website development companies to manage the upgrade across complex frontend architectures.
Conclusion
Tailwind CSS v4 reduces installation to its essentials. For plain HTML or custom setups, the CLI method is two packages and one line of CSS. For Vite-based projects, including React and Vue, the Vite plugin approach requires no PostCSS configuration at all. Next.js uses the PostCSS plugin with a minimal three-step setup.
The tailwind.config.js file, the content array, and the three separate @tailwind directives are all gone. Configuration lives in CSS. Content detection is automatic. The build engine is faster than anything v3 offered.
Pick the method that matches your build tool, add @import "tailwindcss", and start building.

Creates insightful, strategy-driven content that translates complex design and branding concepts into accessible knowledge, supporting Ramotion’s mission to elevate digital experiences.